How to use Hootsuite to manage your social media publishing
Diana Ribeiro
If you have ever read anything about marketing, you might have already stumbled on the statement:
People have to know, like and trust you before they buy anything from you.
If you are a freelancer or a small business owner, chances are that you have a marketing plan in place. And in that plan, you must have some way to keep yourself visible to the people that might need your services. To make yourself known so they can keep you in mind. That is where social media comes along: these days, everyone has at least one social media account, and most likely more than one.
By creating a consistent social media presence, you can:
- Increase brand awareness
- Show off your personality
- Direct more traffic to your website
- Have higher conversion rates
- Become a trusted source of information
While there are many benefits in publishing consistently on social media, the major downside is the time you have to spend to do it — not only in the content creation and publishing itself, but also when you get distracted by social media feeds!
This is where social media management tools come in. By having a centralised place to write and publish your posts, you save time and avoid getting sucked into the endless feed of social media platforms.
Hootsuite is one such tool. It has both free and premium versions, and while the free version is limited to 3 networks and 30 scheduled posts, it is enough for you to try it out and see how it works. I have been using the free version for almost six months and it serves me well.
Hootsuite lets you manage your Twitter, Facebook, LinkedIn, Instagram, YouTube and Pinterest profiles. You can create streams for each social account you manage. This way you can manage comments, likes, retweets etc., from Hootsuite itself. This is particularly useful if you are handing your social media publishing to someone else. The premium version also gives you access to reports, analytics and team working features.
Getting Started With Hootsuite
Head over to hootsuite.com and choose the Free account (you can always upgrade later, if you wish).
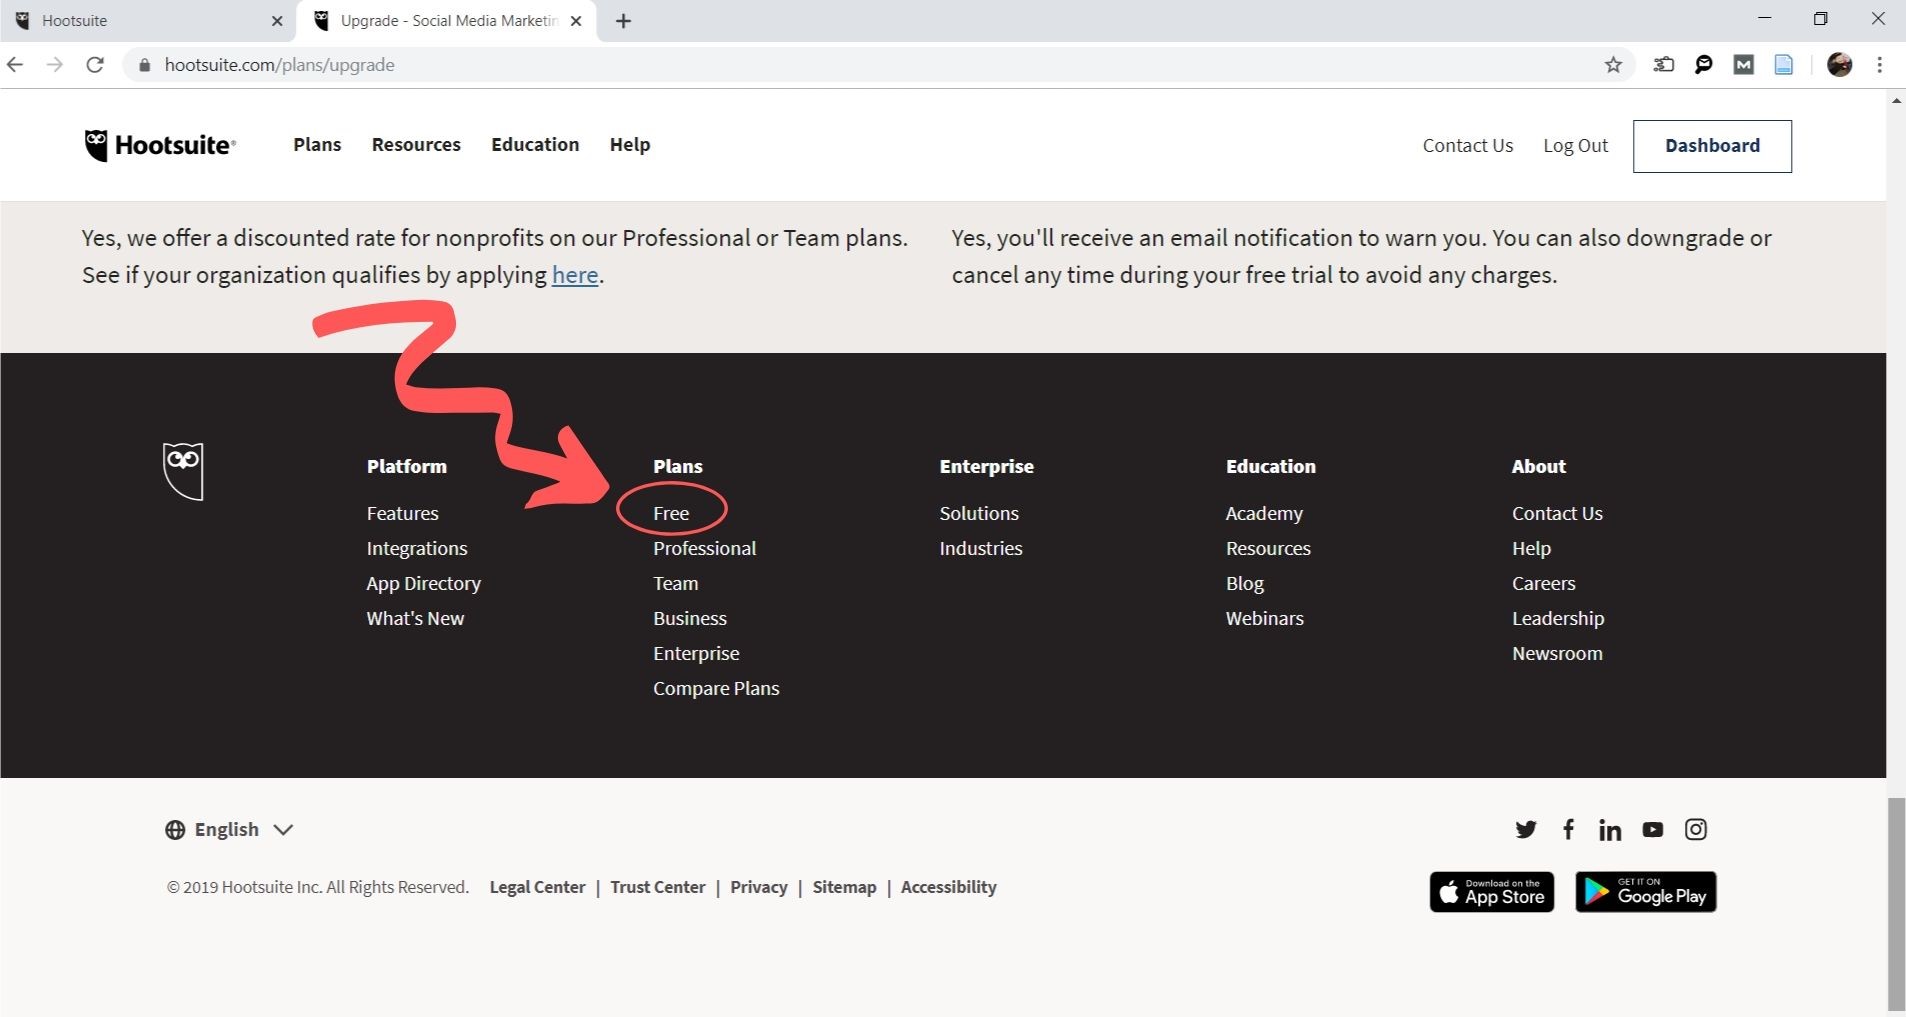
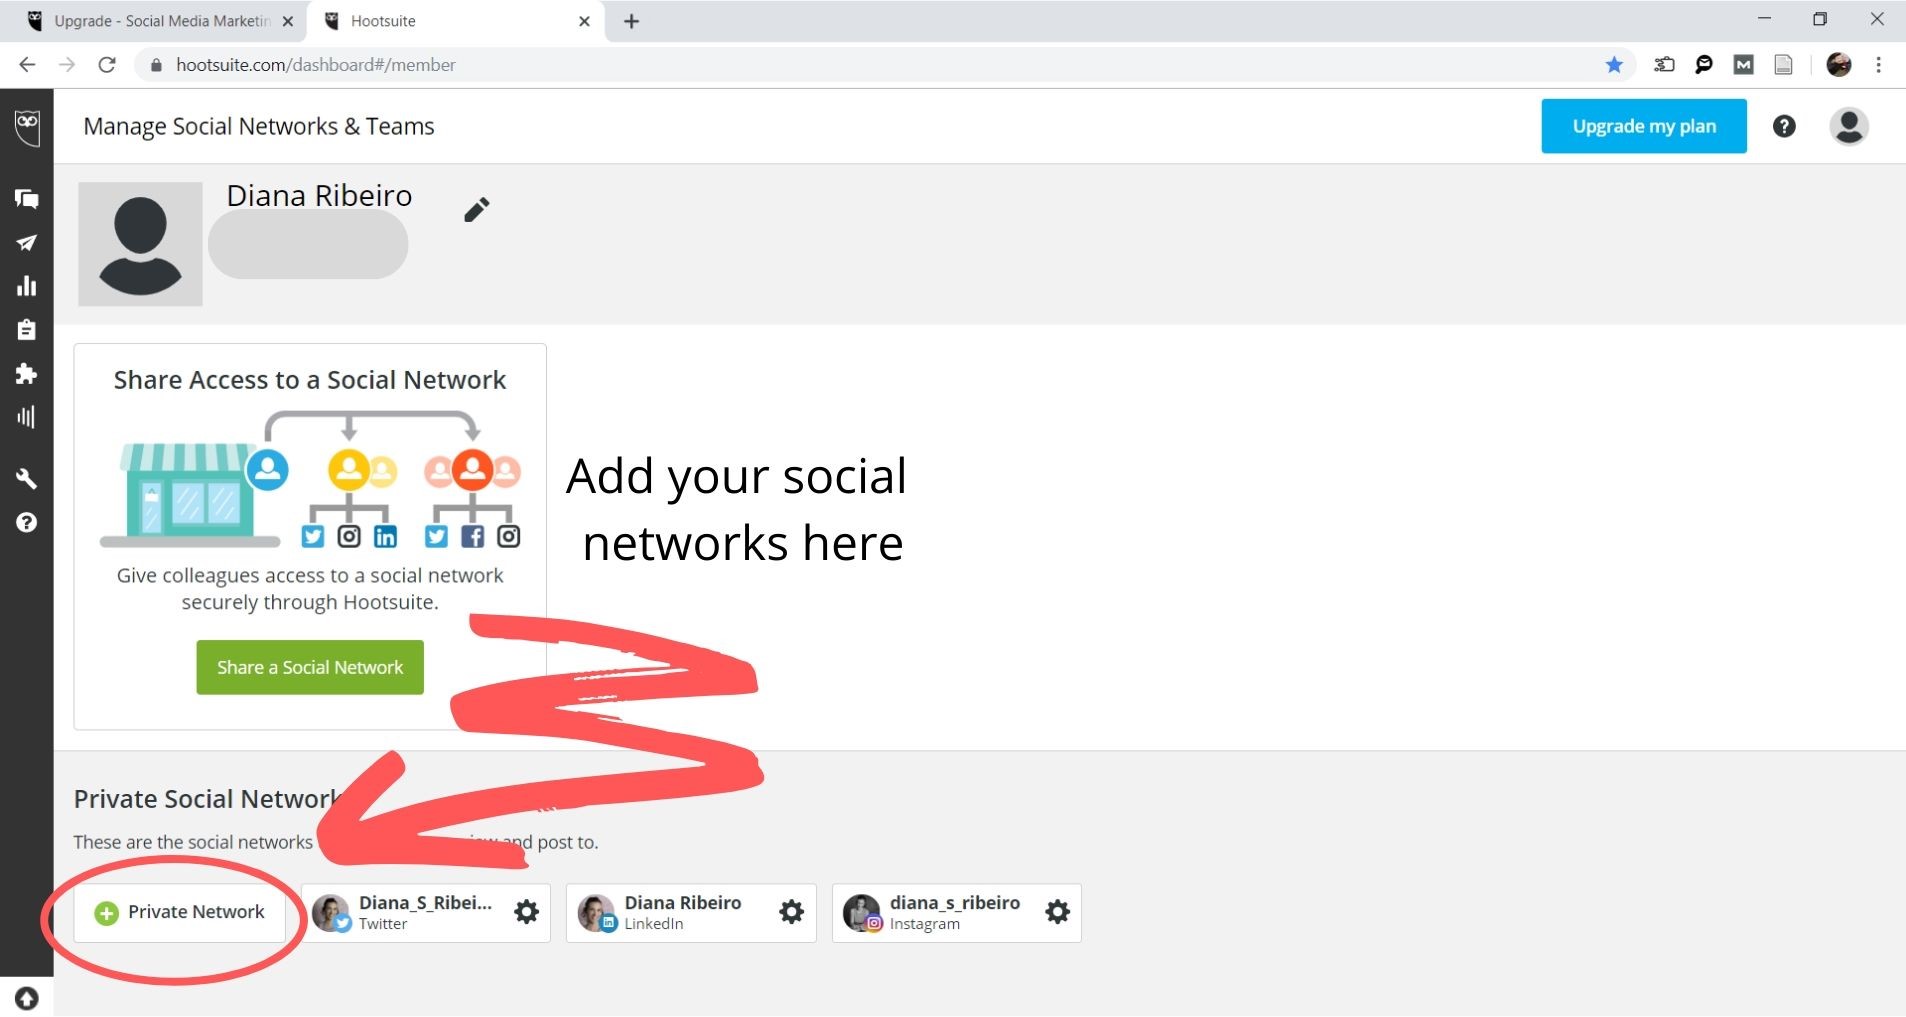
Once you have created an account, Hootsuite will ask you to connect your preferred social media accounts. For each one you choose, you’ll be presented with an authorization screen for that particular network. Click on Authorize and then Hootsuite will give you the option to add additional profiles. The free plan will only let you add three accounts while the paid plans will allow for up to 35 social profiles.
Hootsuite’s team knows how overwhelming the decision process can be sometimes, so they have set up a Wise Guide to help you navigate your way through the platform, showing you tips to get the most out of it.
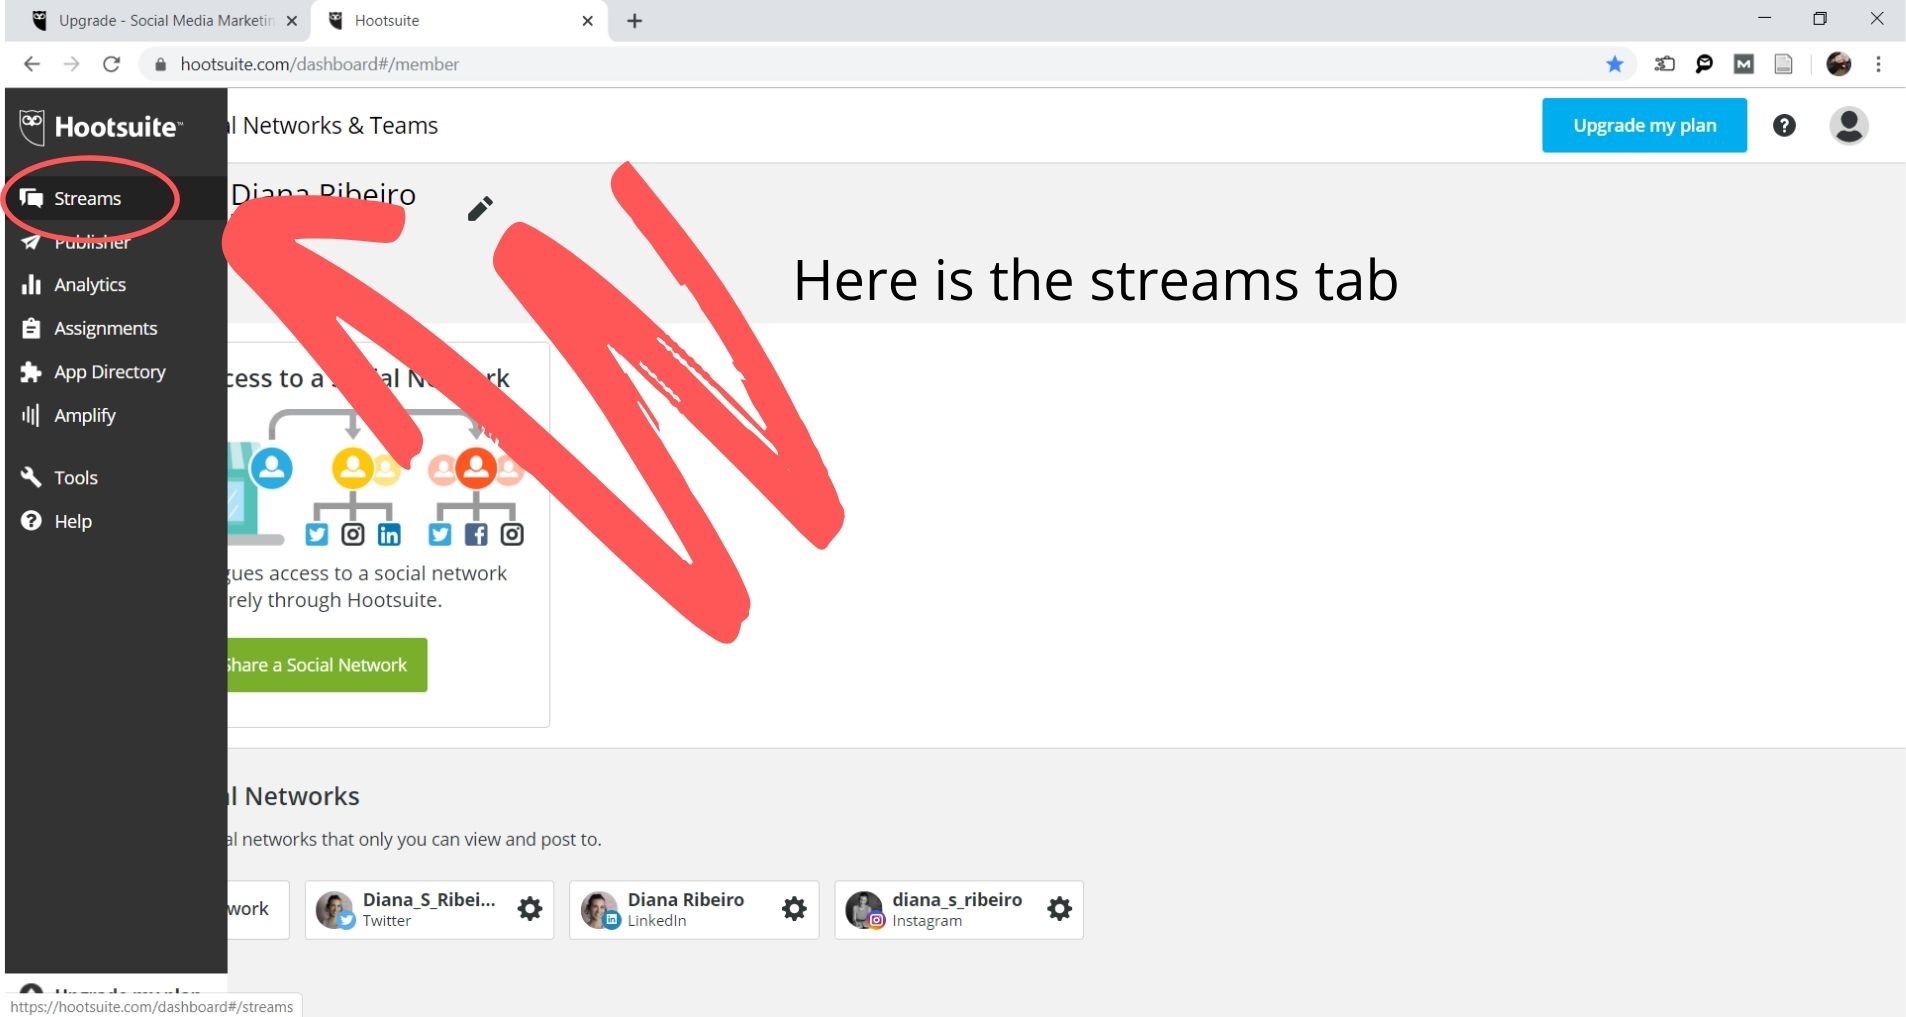
You can then set up your Streams tab to stay on top of the things that matter to you. Simply click on the Streams tab on the left upper side of the screen and choose what to include there — likes, mentions, comments, etc.
Publishing and Scheduling Posts
Now that your account is set up and you have added your social networks, it’s time to explore how to use Hootsuite to publish and schedule your social media posts.
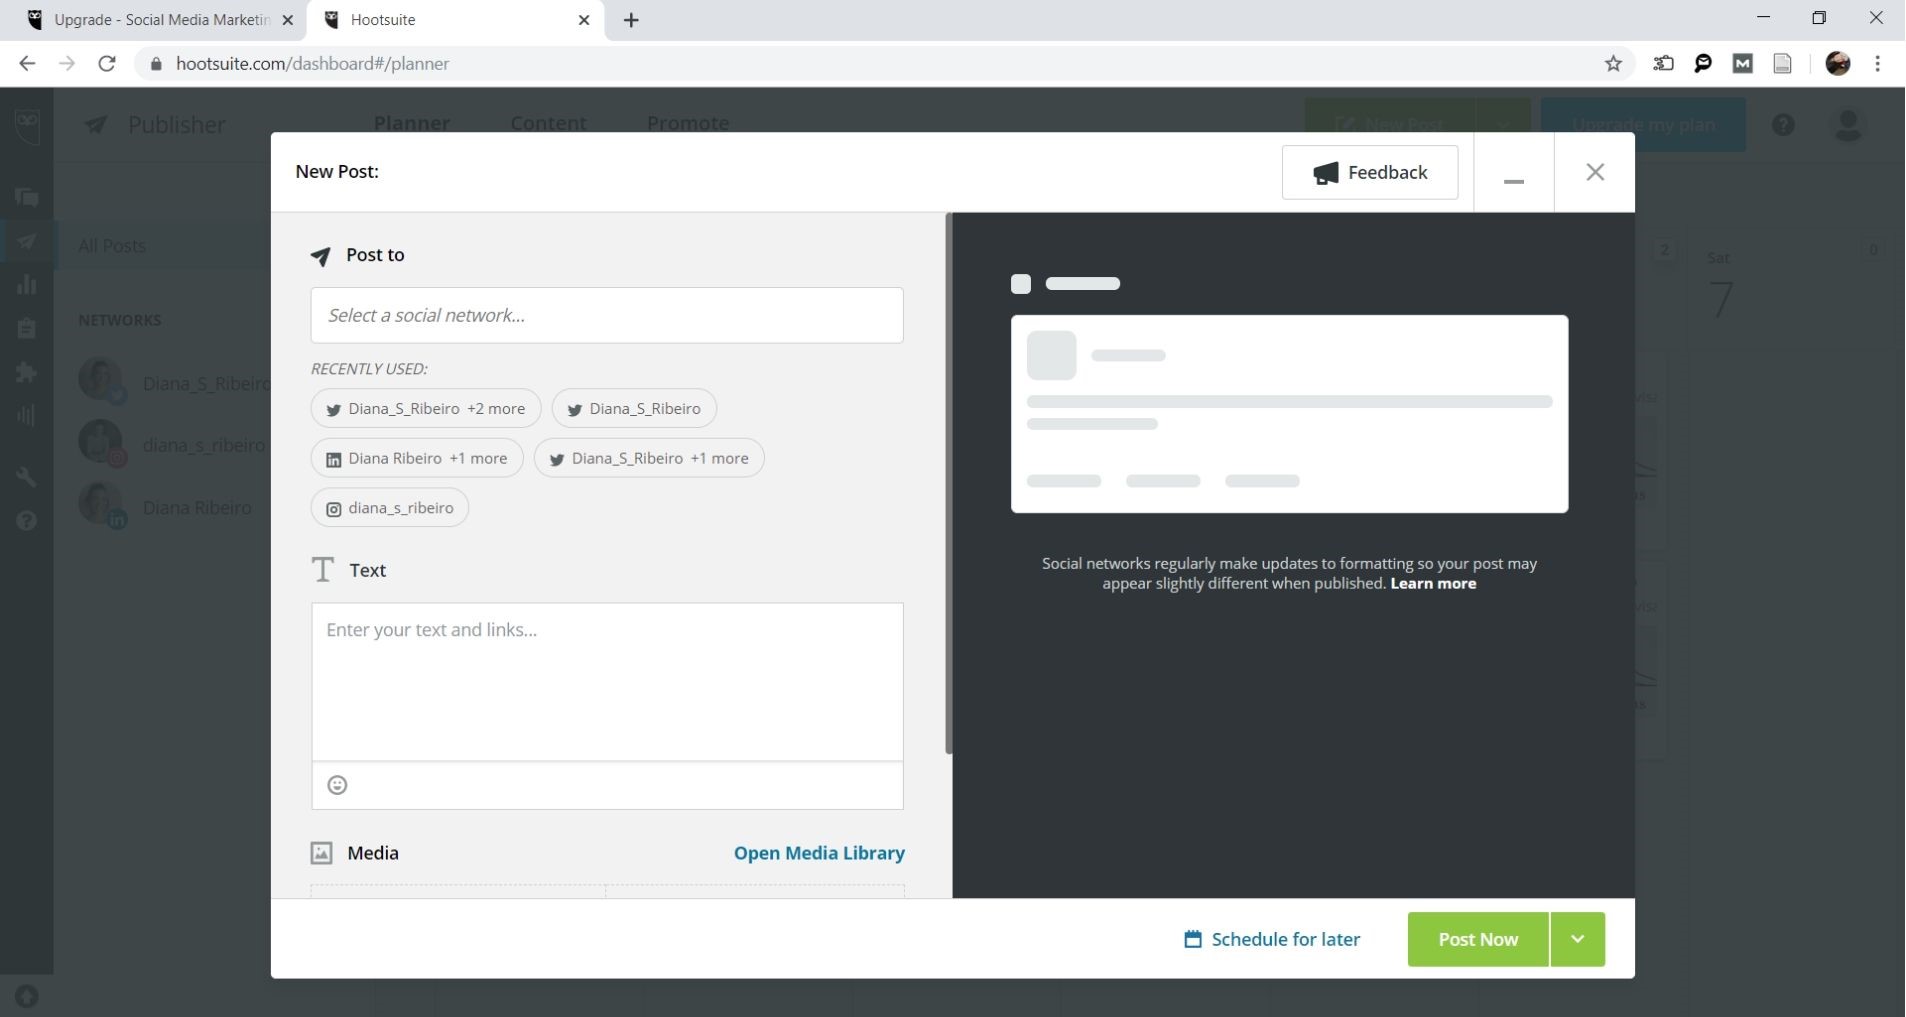
Click on the Publisher tab and you’ll see a calendar-like screen. You can either click on the green “New Post” button above the calendar or click directly on the day you want to publish.
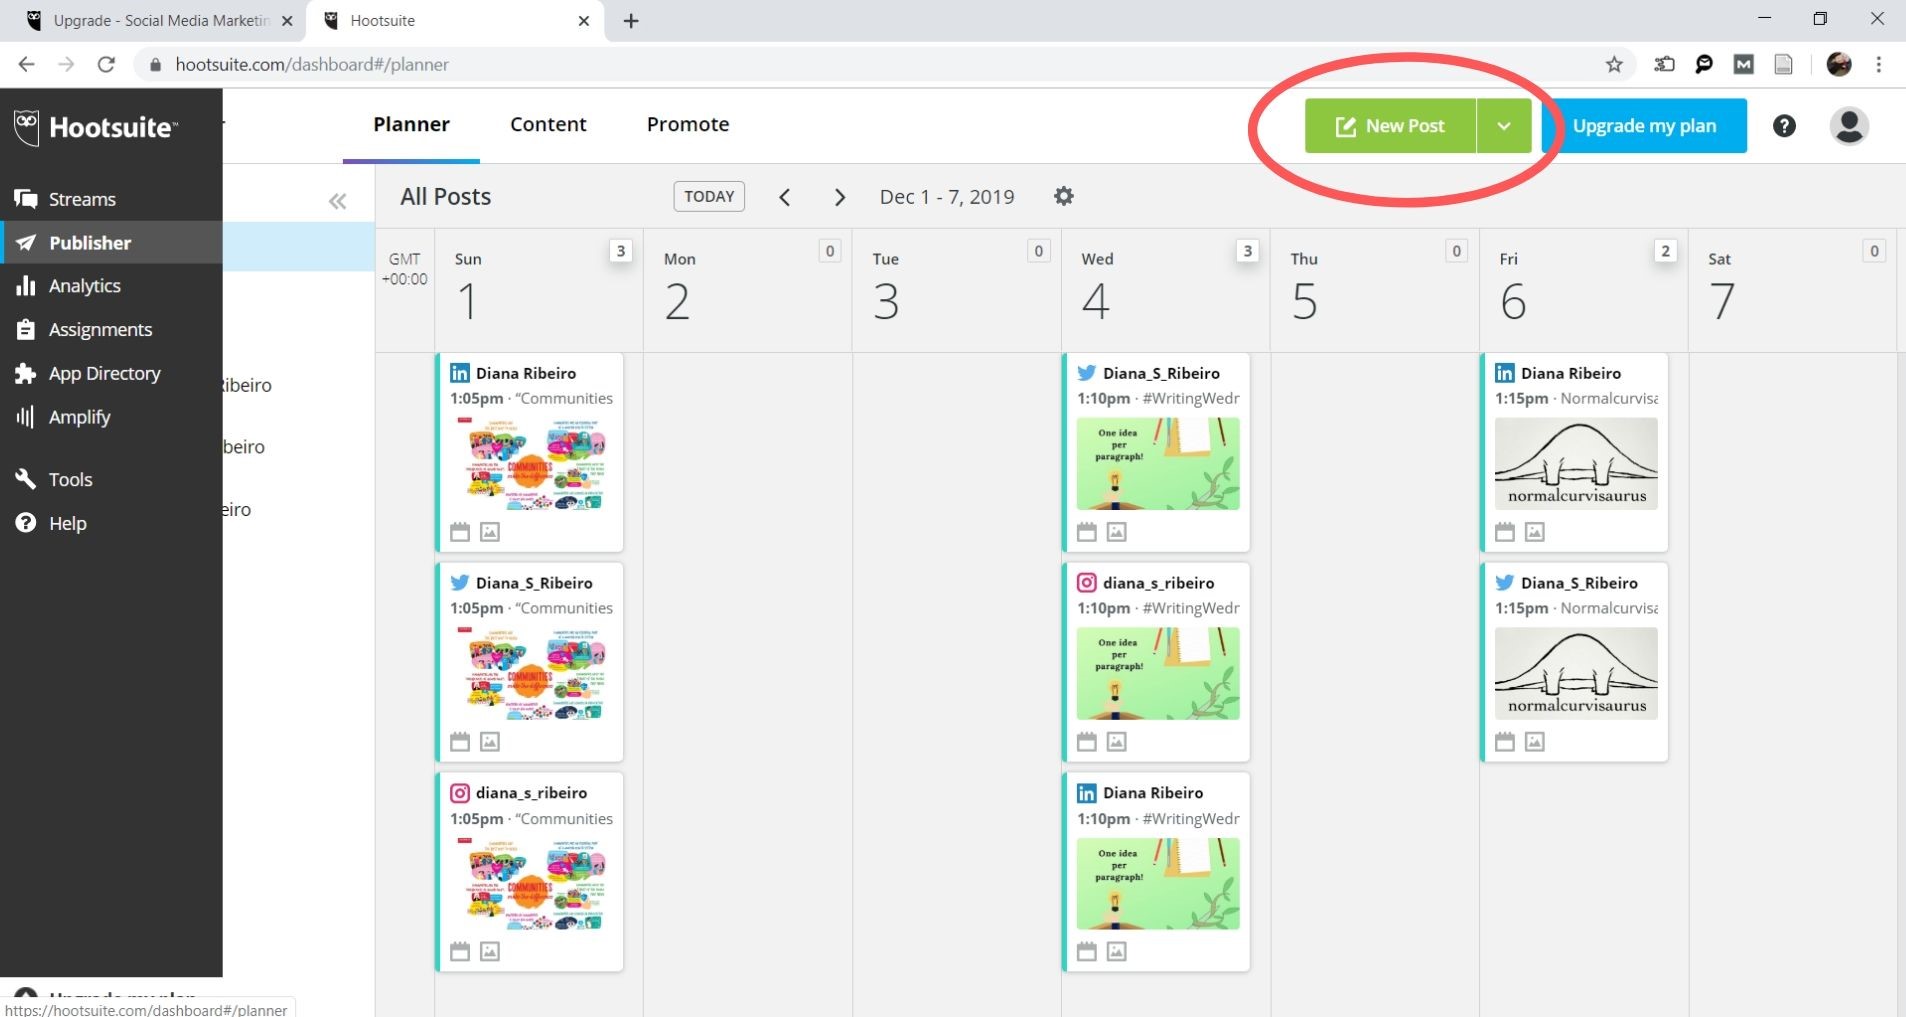
Either way, a screen will pop up, and you then:
- Select the network(s) where you want to publish
- Insert your text
- Add an image
- See a preview of your post on the selected network(s)
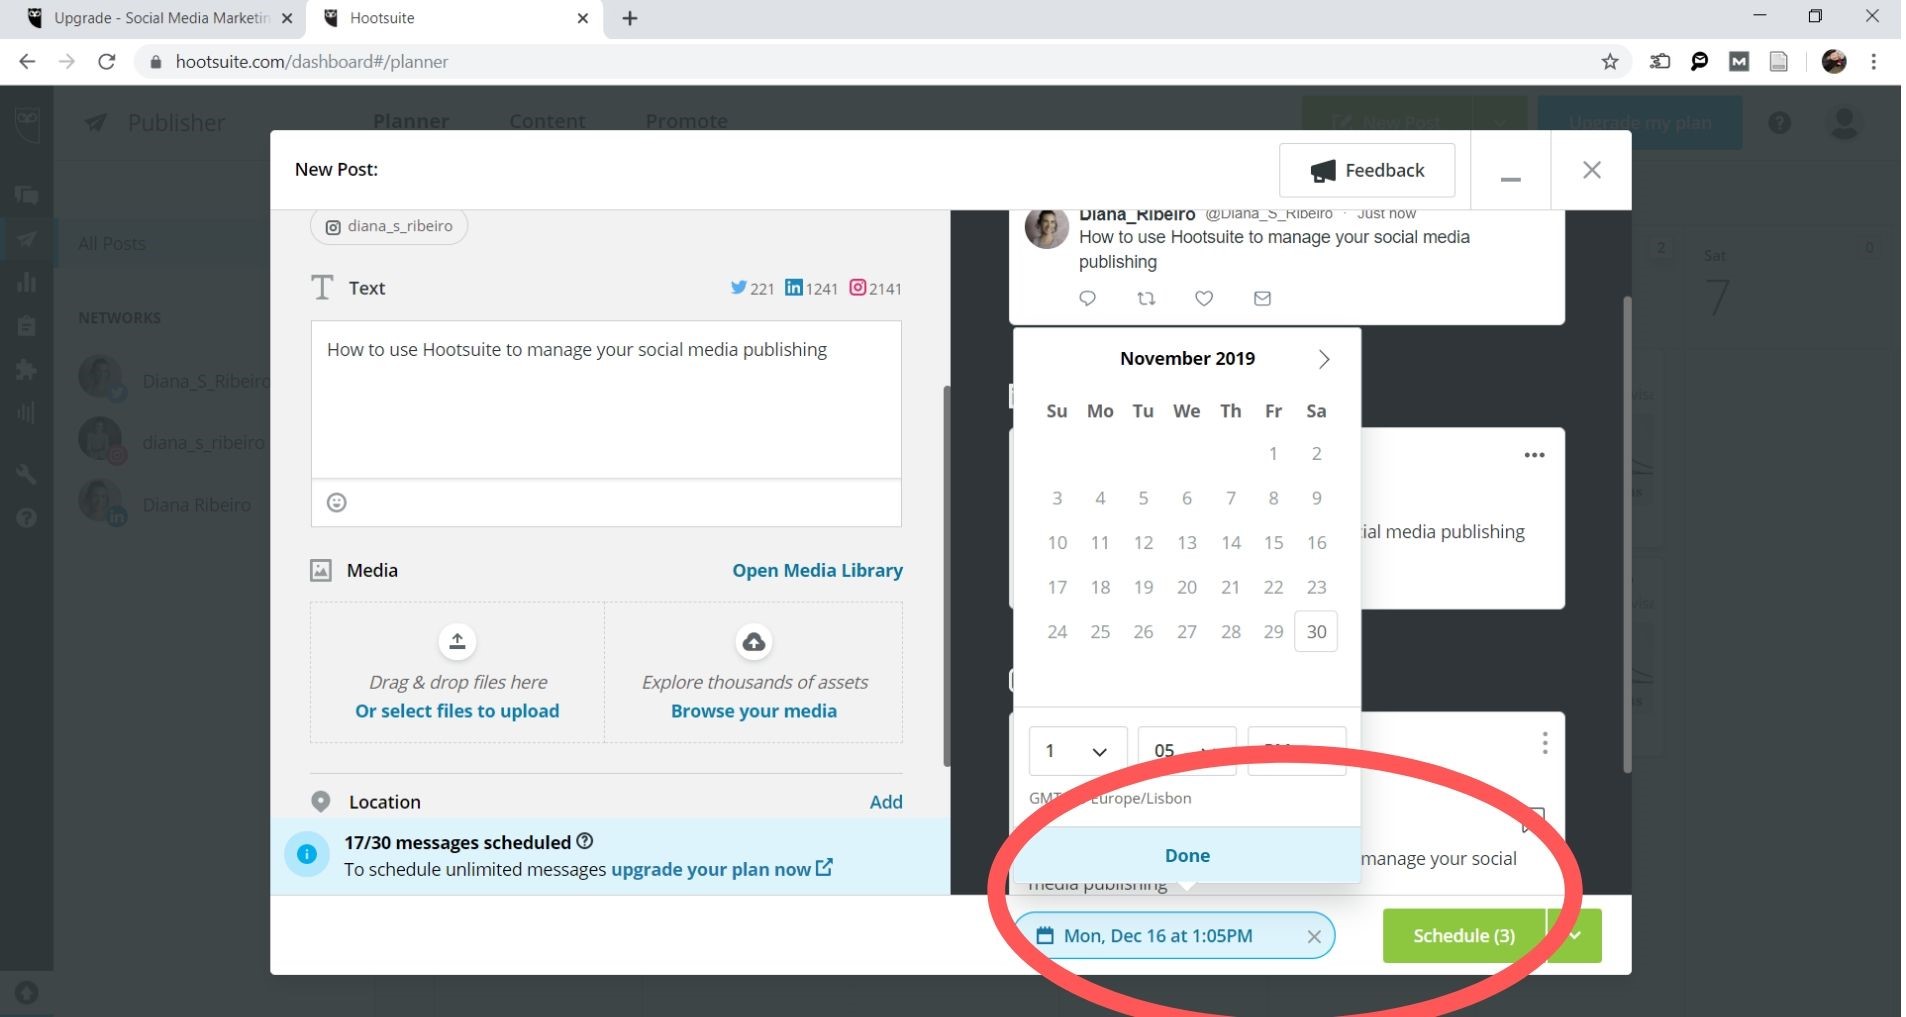
Inserting an image is only mandatory for Instagram, but it can also boost your post visibility on other networks. You can also insert links in the body text, but be aware that some social media platforms might decrease your post visibility if you do so.
For some networks, you can also add location and insert the image ALT text.
After you have set up your post you can either choose to “Publish Now” or “Schedule for Later”. If you choose to schedule the post you have to pick the day and hour that you want it to get published. Note that a single post published on three networks counts as three posts for Hootsuite.
And that’s it, you have successfully used Hootsuite to manage your social media publishing!
It’s important to say that none of this advice produces immediate results. As with so many things in marketing, having a consistent social media presence is part of a larger effort. That is why it is important to have a strategy in place for the long run, and to be realistic about the resources you can allocate to your marketing efforts.
We hope that by letting you know about this nifty free tool you can create a social media publishing schedule and increase your visibility among your peers and prospects. If you would like to see how Hootsuite looks and how to use it, please head over to EMWA’s YouTube channel and check out the Hootsuite video tutorial.